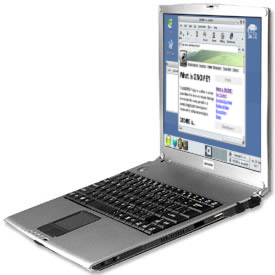
 SuSE 9.0 installation
on sharp
muramasa PC-UM10
The YAST that comes with Suse 8.2 and
higher distributions has a bug that doesn't let it see the packet descriptions
from several types of installation media. Search for "Paketbeschreibungen nicht
gefunden" to find plenty of references to this problem. There are many
workarounds, but I haven't seen any explanations or solutions to this.
The following text describes the steps I took to install Suse 9
on my Muramasa, using a vanilla USB floppy drive as boot device and a desktop
PC connected over Ethernet as a "network CD drive".
Soundcard and graphics adaptor got recognized automagically. The installation
of the ethernet adaptor needed a little help.
- prepare 4 formatted diskettes (formatted to at least 1368 KB). Don't
use bad diskettes (as I always do). if there is a read error on
any of the module disks, you'll have to start the whole boot
process over.

- get a usb floppy drive and connect it to the muramasa
- get desktop PC with ftp server, e.g. WFTPD.EXE (windows) or Linux' ftpd
- connect PC and notebook with a 1-to-1 network cable
- start ftp server on desktop PC, allow "anonymous" access, define the CD ROM
as ftp (document) root directory, e.g., "F:\"
- now, you'll have to use ftp to copy the first CD over to the muramasa's
hard disk. I kept the "factory default" partitions and made a directory
"suse" on the 2nd partition (D:). YOu can use the Windows ftp client
to transfer the files, however, this client doesn't support transfer
of whole directories (WSFTP does). This means that you have to rebuild
the directory structure of Suse's CD yourself on the notebook and transfer
the files (bin, prompt, mget *) of each directory separately.
- you'll need the other 4 CDs later. If you want to be able to install them
from harddisk, too, copy them now like the first one, also into "suse".
Theoretically,it should be possible to use ftp as installation source and
install directly from the desktop PC's CDROM, but I didn't get that to work.
- make Linux Boot disk on the desktop PC: start [CD1]/dosutils/rawwritewin/rawwritewin.exe
(from SuSe CD1) (assuming desktop PC running under DOS/Win)
- select "[CD1]/boot/bootdisk." and go "Write" (to floppy, requires
a disk formatted to at least 1.4 MB)
- setup notebook to boot up from floppy AND to "emulate USB keyboard in
DOS mode". Also, disable "Plug&Play" and set "large disk access" to "other"
- boot linux :-)
- select "installation" from SuSe's boot menu
- make coffee and have it
- the boot loader will ask for "module disk 1". Hmm. get another empty floppy
and go
[CD1]/dosutils/rawwritewin/rawwritewin.exe with "[CD1]/boot/modules1."
on the desktop pc. insert it into the notebook's floppy, "ENTER".
- the installer reports "found PCMCIA chipset yenta_socket" and asks for
"module disk 4". make that one as you did "mod disk 1".
- next, you'll see a warning: "no CD found, starting manual installation".
confirm that
- answer language questions. now go "Kernel-modules/hardware drivers". Go
"load network driver". Make "module disk 3" and insert it.
- The installer offers a list of available network drivers. The one to pick is
Realtek RTL8139. The system replies "successfully loaded", then asks
for options. Leave the line empty and "ENTER". Again, you'll see
"successfully loaded".
- Go "Back", then "Installation/start system". Select
"harddisk" as installation source
- The Installer asks for the location of installation CD. Select "hda5" and
"suse" (not "suse/").
- YAST loads and asks you to repartition your hard drive. Either accept the
suggestion or not. Of course, you'll have to keep the old "D:" partition,
as it holds the Linux installation CDs. D: is the first logical drive
on the extended partition (in DOS speak), this is called "hda5" by Linux.
YAST defaults to reducing hda5's size to 3 GB which is just enough to
hold the 5 Linux CDs.
- Install a basic system that doesn't need data from CDs 2-5 (YAST doesn't see
them, even if you copied them over! if you're asking me, YAST is a
can of worms!)
- Reboot. Now, you can install the software you want. select "ftp" as
installation source (didn't work for me), or,
if you copied all 5 CDs over to the windows D: partition, select the
appropriate path name (if you accepted YAST's defaults, it will be
/windows/D/suse).
- YAST autoinstalled my screen as being 800 x 600. I easily changed it to
1024 x 768 @ 60Hz with YAST.
That's it. If you found any errors in this description, please let me know:
mura(here goes the at sign)jeudi.de <Johannes>
To the Muramasa PC-UM10 forum
 SuSE 9.0 installation
  SuSE 9.0 installation